Follow on Bloglovin

Tuesday, December 1, 2015

Dre Does an Adele Inspired Tutorial

I shared the picture above asking if you guys would like to see my Adele inspired makeup look and the response was overwhelming! Thank you always for your support! I obviously bought Adele's album the day it came out and every time I listened to it on my phone, the photo above of her makeup was looking back and me and I knew I wanted to re-create it. I realize it's not a color photo but the defined and contoured eyelook was what I was after. The look is super easy and honestly a great look with or without the liquid liner, for those of you who are still working on the perfect wing! The thing I like most about this look is that it is about layering shadows from light to dark, so you're in complete control of how light or dark you want to make it. Every shadow I used was from the Too Faced Natural Matte Palette and while you certainly don't need this palette to get this look, I highly suggest investing in it or adding it to your christmas wishlist. I don't know what I would have done without this palette for my freelance kit because everything you need to start and blend a look is in it. Without this turning into a Too Faced review....let's begin!
(On my lips is the Maybelline Color Sensational 'The Mattes' Lipstick in Daringly Nude)


1. As usual I started with a primed eyelid and then applied Heaven from lashline to brow bone using a flat shader brush. 
2. Using a very fluffy blending brush I mixed Lace Teddy and Nude together and applied them throughout the crease. As you can see this doesn't appear too much darker than the Heaven shade, but thats what I want. This look is all about slowly building the color and blending A LOT! Adding the lighter/medium shades in the crease will make blending the darker colors much easier. 
3. Next, I mixed Cashmere Bunny and Risqué on a pencil brush and applied it in my crease. Using the same fluffy blending brush from step 2, I blend the crease color out. I want the edges to be more blended on the top as you can see but the area where my crease meets my lid, I keep pretty intense and not so faded. 
4. The last shadow step is to take some more of Heaven and apply it to the lid to create that contrast between the dark crease and light lid. This is what gives Adele's look that defined and contoured eye shape. 
5. Next it's time for liquid eyeliner. In this look I used the NYC Liquid Eyeliner which is such an inexpensive and great product. It's only a couple dollars and is especially great for those who are practicing winged liner because you won't feel bad wasting expensive liner if you have to remove and re-apply. I always start my winged liner with a small line extending from the end of my lashline outwards. The angle I create is based on following my bottom lashline and extending that line out. 
6. Next, I draw from the end of the tail I've created back to my lashline, creating a little triangle. 
7. Lastly, I create the line along my lashline from the inside of my eye connecting to the tail I've just made. If this seems super confusing let me know and I can create a post completely devoted to how I do winged eyeliner!
(I unfortunately didn't get a picture after I finished my eyeliner, but I always perfect that line of liquid liner along my lid at the end to create a smooth line so please excuse any uneveness!)
8. The last step is lining your waterlines. I used Black on the top lashline and NYX's Wonder Pencil (a nude shade) on the bottom to get that bright open-eyed look like Adele has in the album cover. Two coats of your favorite mascara and you're done!

And that's it! You can get Adele inspired makeup that easily! Let me know if you have any questions or requests of makeup looks to recreate. I really enjoy recreating celebrity looks for you guys!

I hope you all had a wonderful Thanksgiving and please know that I am so thankful for you!

Have a beautiful day,

Dre


Tuesday, November 10, 2015

Dre Does Brows for Beginners

I had a good friend reach out to me lately asking for some pro tips regarding brows and it got me thinking that I've never really covered the basics regarding filling in brows, here on Dre Does. So I decided to share some of the basics with you incase you have never filled them in before and don't quite know where to start. 

1. Start small: If you've never colored your brows in before ANYTHING is going to look more dramatic than what you're used to. Just because you notice a huge difference doesn't mean they look bad. I would recommend starting with a tinted brow gel first, working your way up to a pencil, and then moving on to a tinted wax or pomade if you're really feeling confident. Filling your brows in for the first time should be subtle and minimal to avoid going too dramatic. 

2. Small Strokes: If you are using a product to fill them in always use small hair-like strokes because after all you are trying to make your brows look like they are full of more hairs. No one has perfectl straight and opaque brows naturally, so don't make long and intense lines with your product. 

3. Get a spooly: You'd be surprised how different and much easier filling your brows in is when you have a spooly for blending. A spooly is simply a disposable mascara wand and you can find a pack of them for only a few bucks at your local beauty supply store. If you don't want to go out and buy one, simply wait to use up your current tube of mascara (if it's one with a traditional bristle brush wand) and sanitize it for use in place of a spooly! Simply apply your brow product like you normally would and then use your spooly to slowly brush through the brow hairs and blend the product. This will ensure that your filled in brows don't look so fake.

4. Start in the middle: Whenever you are filling in your brows, I recommend starting to fill the middle of the brow first for a few reasons. If you're using a product that has a wand or brush (so a tinted gel or pomade for example) you will have the most product on it initially. You don't want to put all that product right in the front of the brow because naturally we aren't the fullest right where the brows start. It's also hard to master how to start your brow, so slowly building the front with only a little bit of product will help you acheive a much more natural look. This will help you avoid the obvious, too squared off brows. 

5. Shade is key: Don't use too dark or too light of a product. Brows should always stay a little darker than your hair if you're blonde, or a little lighter than your hair if it's darker. Also unless you are a red head, your brows should stay ashy and cool-toned. No one really has warm brows except for red heads, so picking the right tone of product will help you avoid your brows looking fake!

6. Get them shaped by a professional: I tell all of my clients that they beauty of getting their brows shaped is that I give them the blueprint to fill in their brows. Simply follow the shape I've waxed them to and in no time you'll get the hang of what you should be filling in. I take the guesswork out of adding product and will even show you how to do it if you need help. If you're in the Lansing area I would love to help you in person, but if not, find someone you trust to help shape your brows and get rid of unnecessary hairs!

7. Get them tinted: If all of this seems way too difficult and intimidating, look into tinting. This is a service I personally perform at the spa and it allows me to tint the hairs and underlying skin, to look like the brows are fuller than they are and to help emphasize the shape I give by waxing. The tint lasts up to 3 weeks so it's a great option for those who don't want to fill them in with product every morning. 

If this post stirred up any questions you might have regarding brows, please feel free to leave a comment below or on my Facebook page! I hope this helps!

Have a beautiful day,

Dre

Monday, November 2, 2015

Dre Does a Beauty Secret

If there's one thing us makeup artists and makeup enthusiasts can agree upon, it's that cleaning brushes is the bane of our existence. It's the thing that we know we have to do but always dread. Well I'm here to share a tip I discovered about a year ago but didn't actually try out until very recently. I'm happy to say I'm never going back to my old ways!

So what it is? A solid brush cleanser. You may have heard of the most famous one from Beauty Blender that retails for $16 for 1 ounce of soap. The idea is that you wet your brush or sponge and swirl it around on soap, pick some up and then use that to clean the brush in your palm or whatever you normally use to clean your brushes. I have always used baby shampoo for deep cleansing my brushes because it's just how I was taught and what has always worked. Mind you this always takes forever when you have a lot of brushes and I feel like I'm always wasting shampoo because I'm pouring it into my palm.

Well I heard another makeup artist suggest trying Dr. Bronner's Pure-Castille Bar Soap as a solid cleanser and seeing as it costs a shocking $4.69 for 5 oz, I figured it wouldn't hurt to try. OMG! Ladies go out and buy this completely organic soap ASAP and try it. Not only is it ridiculously cheaper than the Beauty Blender's alternative, but it's organic, conditioning for your brushes with coconut and tons of other oils, and it comes in so many different scents. Since it doesn't come with a container to store it in like the Beauty Blender one, just make a trip down the travel sized beauty section like I did and snag yourself a clear 97 cent container to store your bar of soap in.

I love how quickly I can wash everything too because I'm not picking up a shampoo bottle and pouring out and wasting extra product with every brush. It also cleans the brushes quicker than I've ever seen! I've linked the Citrus scent above which is the one I am currently using.

If you try this out and love it, let me know! Also please feel free to share any other beauty secrets you might have!


Have a beautiful week,

Dre

Tuesday, October 20, 2015

Dre Does an EXO Supply Review

Now that the flu is finally starting to stop occupying my body, let's get to a post I had originally planned for last week! A few month's back I was contacted by the company EXO Supply to try out two of their new products. They are a relatively new organic and natural company and since the two products involved skincare (hello!) and nails, I was excited to try them out. I love that their products are all formulated with USDA certified organic essential oils. I love me some essential oils because of not only their benefits and versatility, but most importantly their smell. I received the Natural Foaming Coconut Cleanser and samples of both the Lavendar and Citrus scented Pure Removers. 


I was excited to try the Coconut Cleanser because it is super gentle and safe for all skin types. I have oily and acne prone skin and while I normally prefer to have a really deep cleansing cleanser, I still think it's important for all skin types to have a gentle and soothing face wash in your drawers for days when you're skin is really irritated or hypersensitive. The fact of the matter is that I live in Michigan; where the weather changes drastically at a moments notice and my skin can reflect that. 


The Pure Coconut Cleanser is formulated with coconut oil obviously, but also jojoba oil and floral waters. I initially wasn't too thrilled with the cleanser because I didn't feel like I was getting a deep enough cleanse. However, once I started using it as the first step in a double cleanse, I liked the results I was getting. I now use it every night to get every last trace of makeup off before I go in and deep cleanse my skin. I know you might think this is excessive, but when you're as acne prone and sensitive as I am, this extra step helps! Plus I've liked having it on hand for those sensitive nights. The Pure Cleanser retails for $16.95 for 6 Oz. 


The next product I tried was the Pure Remover which is a completely organic and natural plant-based nail polish remover that is both alcohol and acetone FREE! I repeat, alcohol and acetone FREE! The scent is completely naturally and the product is non-toxic too! While I think this is an amazing natural option for everyone, I think this product would be amazing for use on both children AND women that are pregnant who are looking for organic and non-toxic options! The wipes are a great option if you're traveling or simply like the convinience, but they also sell bottles of the Pure Remover if you prefer. (Can we talk about how proud I am that I remembered to take a picture before I ripped the adorable packaging open and ruined it?!)  The wipes are available in packs of 10 ($12), 20 ($24), or 30 ($30) and in the scents Lavender, Mint, Orange, or Unscented. The bottles are $15.95 for 4 oz and come in the same four scents. 

You can find out more about EXO Supply and their products by visiting www.EXOsupply.com or checking out their Instagram (@exo_supply).

A huge thanks to EXO Supply for letting me try out these awesome products! 

Have a beautiful day,

Dre

*These products were sent to me to try out for free but all opinions are my own and I wasn't required to post about them! 

Monday, October 19, 2015

Dre Does Hair Accessories

I don't know about you but I'm really picky when it comes to the hair ties and headbands I wear when I'm working out. I hate when my hair feels like it's falling out or loose, so I'm always searching for functional yet pretty ones. I am happy to report that I have found a few hair accessories that have lived up to my expectation and I'm here to share them all with you!

First up we have hair ties. I have to always have a hairtie on my writst because when I'm at the spa, I need to be able to tie my hair back at a moment's notice. However, I'm usually dressed up and I don't like the look of classic hairties. I got a coupon for the scunci Everyday & Active 3X Braided Elastics (around $2.99) so I decided to try them out. I am obsessed! They look like a cute braided bracelet on your wrist, but have amazing stretch and really grip the hair well. I only need one of these to keep my hair in place during even the most intense workout. I got my pack of 6 black braided elastics at Target but I've seen them at other grocery stores too! They also come in a multi color pack which I will probably pick up next!

Next, I found two headbands also from scunci that I really love. Both have rubber grips sewn into the undersides so they always stay put no matter how much I'm moving when I'm working out. The first is the No-Slip Grip Braided Headwrap (around $5.99) and I can't get enough of. It not only holds my hair back, but it adds a little bit of style too! 

Lastly is the No Slip Basic Headwrap (around $6.99). I like how this one keeps all of my hair completely out of my face because it's so wide, yet it doesn't budge when I'm moving. I have both of these headbands in black and bought them at my local Ulta. 

What are your favorite hair accessories? If you have any suggestions please leave a comment below so I can try them out!

Have a beautiful day,

Dre

*This post is not sponsored by scunci and everything was purchased with my own money.

Friday, October 16, 2015

Dre Does Friday Favorites

It's been too long since I've shared some Friday Favorites so I thought I'd give you a taste of what I've been really enjoying lately.

First up we have a fall themed favorite that I discovered when looking for something else! I'm a huge fan of greek yogurt and it's the only dairy I consumer besides the occasional addition of cheese when I'm cooking. I heard that Chobani had Pumpkin Spice Yogurt and even though I didn't think I would like it I set out to find some. Luckily I came across the last one while grocery shopping last week and right next to it was an abundance of the Cinnamon Pear flavor. I grabbed a few and it turns out I ended up hating the pumpkin spice one and being OBSESSED with the Cinnamon Pear flavor. It's so delicious. While they are higher in sugar than I like (15g of sugar and 12g of protein), if you're looking for a healthier option to having dessert at night, I highly recommend trying the Cinnamon Pear flavor as an evening snack!

 Even though I'm already more than halfway through the 20's I really enjoyed reading this article from Emily, one of my favorite fashion and lifestyle blogger's from Cupcakes and Cashmere. It's filled with some great reminders so take a look when you have a second.

I have been obsessed with the Becca Shimmering Skin Perfector Spotlight in Opal (the liquid version of the Shimmering Skin Perfector family). It came in a kit of four mini's from Becca that I purchased about 6 months ago. While I fell in love with two of the four really quickly, this one kind of got thrown into a drawer and for some reason I decided to pull it out last week and start using it. Not sure what compelled me to do so but thanks to whatever intuition I should thank for my now glowing skin! It has a nice, flat applicator that makes it really easy to dab one side on one cheek, flip it over and dab the other side on the other cheek! Then I use my beauty blender to blend the product well into my skin so I have no harsh edges (I should note that I always apply it after my under eye concealer as my last liquid product. I then set my under eye concealer with powder and finish my face with my other powder products). I love how dewy and healthy it makes my skin look. The nice thing about the full size version of this product is that it comes with a pump so you can mix it in with foundation or moisturizer to give you an all over dewy illumination. It will definitely be added to my beauty wishlist.

While I haven't mentioned it for awhile here on Dre Does I reach for my Aveda Beautifying Composition often especially as the weather starts to get chillier. Recently I've been noticing some random dry patches around my nose and eye area so I pulled out my trusted friend and have been adding a drop here and there to combat these random flaky spots. I love the aroma and the versitility of this product and will never be without it. Click here to see a post I did on it more than a year and a half ago showing 11 uses for this magical product!

Cycling or spinning (depending on what you call it...haha) used to be a huge part of my life. When I was a senior in high school my mom dragged me into a class with her and I was hooked! I am super competitive by nature and loved being able to push myself every class. I started going multiple times a week and it became a huge part of my workout routine. I slowly got out of it as college and life got busier and it had been years since I have done it. A few months ago though, the gym at my apartment complex got a spin bike and I couldn't have been more excited. I dusted off my spin shoes and have been spinning at least 4 times a week since! I forgot how much I truly love the workouts. You can find great spinning workout ideas on Pinterest if you need some inspiration. If you're not the biggest fan of running and you've never tried it I highly recommend giving it a shot! I think it's really important to find a class in your area to get started so that you can learn proper form and technique from professionals before you try it on your own.


Tuesday, October 13, 2015

Dre Does 5 Tips You Can Start Now to Prevent Aging

When I share with someone that I work in the beauty and skincare field, women will often tell me "I wish I had started younger." It's no secret that prevention is key in so many aspects of life, skincare being no exception. 

I'm here to bring you 5 things that you should start doing today that your older self will thank you for later in life. These tips aren't anything ground breaking or new but I hope they serve as a reminder that prevention is key when it comes to aging. If you take good care of your skin it will be reflected later on in life.

1. Wear SPF daily. This one might seem like a no brainer to some of you but it's amazing how many people my age I find still don't wear it on a regular basis. Time and time again I hear more mature women telling me stories about how they baked in the sun with baby oil instead of using any sunscreen and they wish they had known how much damage it would cause later in life. Not only is the sun one of the largest contributers to aging your skin but HELLO! SKIN CANCER! Let's make sure we all make it so see ourselves wrinkle. Whether it's in your foundation or a separate step don't skip the SPF ever (even in the middle of winter).

2. Establish a skincare routine. This one is another vital aspect to aging gracefully. If you haven't established a skincare rountine yet it's time to do so. This doesn't mean you have to have 20 steps day and night, but you need to make sure you are at least covering the basics. When we properly cleanse, tone and moisturize our skin, we maintain the health of the acid barrier of our skin. So why is this important? When the acid barrier of our skin is healthy, it can protect us from all sorts of environmental factors and impurities that we encounter on a daily basis. The skin does so much for our bodies and if we take good care of it, it will keep us protected and help us age slower. 

3. Learn about your skin. Whether this means going to see an esthetician or visiting your dermatologist, make sure you take the steps to learn about what is actually happening specifically on your face! We are all unique and even if you think you know what's going on with your face, you might be completely off. With the guidance of a professional you can make sure you are using the correct kinds of products.

4. Drink more water. This one might seem like a no brainer too but most of us have dehydrated skin which can contribute to the appearance of fine lines and wrinkles. It's pretty rare that when I check someone's face for dehydration they aren't even slightly dehydrated. Our skin is the largest organ of our body and also the last to get water so it's important to make sure that we drink enough of it. If you are really active or under a lot of stress, it's crucial to drink even more! 

5. Use an eye cream. The skin under our eyes is thin and fragile and completely different than the rest of our faces. This is why it's vital to use a separate product on it that is also approved for the eye area. The eyes are also one of the first places you will notice fine lines and wrinkles, so starting early with an eye cream can help keep that area looking young and fresh, longer. 

If you are already doing some or even all of these things, keep it up! You're on the right track to aging gracefully. If not, pick a few and start adding them all in slowly.

Have a beautiful day,

Dre

Saturday, October 10, 2015

Dre Does a 5 Minute Fall Transformation

I wanted to create a really simple look that only required a few extra minutes added onto your normal face routine to be fall ready. The focus of any quick look for me will always be my lips because it is the quickest way to add drama and let's be real...fall is all about the drama on the lips. 

When I think of fall makeup I think of warm earth tones; oranges, reds, plums, berries. All of these shades work really well with trying to extend your summer bronze and still look ready for the fall season. Below you'll see that I did my normal face routine (let me know if you want to see exactly what that looks like recently), and then used ONE eyeshadow and ONE lip product to transform my look.


For my eyes I simply applied my normal primer (Benefit's Stay Don't Stray in Light/Medium) and then packed MAC Cosmetics' Amber Lights onto the lid. It's a beautiful metallic orangey bronze color that compliments the warmth of fall so well. The thing that I love about metallic colors like this is that if you just buff out the edges with a blending brush, you look like you have a complete look because the metallic sheen giving so much dimension on your lid. Apply your mascara and you're done!

For the lips I used one of my favorite products ever; the Lorac Pro Matte Lip Color in Merlot. These lipsticks are amazing because they go on so smoothly, are so pigmented, don't require a liner to stay put, and they last forever. I love how this deep shade screams fall. 

There you have it! I took a really basic look from natural to dramatic with the use of only two products. I highly suggest you go through your collection and find duos like this that work well together and take note of them. This way when you're running late in the morning or at night, you can quickly amp up your look in no time at all. You could even wear just the shadow for work and add the lips just in time for happy hour with your friends!

Let me know if you find any great combos! 

Have a beautiful day,

Dre

Dre Does Empties #3 (Shower Edition)


I have been trying very hard recently to use up the products I've already purchased. It's been really difficult since new launches are always greeting my Instagram feed, but as you've probably guessed it with this empties post, I've been doing a pretty decent job of getting through them. I seemed to run out of everything all at once in my shower thus the reason this post is shower themed!

If you've never read an empties post, they are one of my favorites because my opinion on the product comes only after I have completely used it up. I then share whether or not I would repurchase the product which hopefully helps you decide if it's something you would want to spend your hard earned money on.

Without anymore rambling....let's talk trash (beauty trash)!

Philosophy Cinnamon Buns Shampoo, Shower Gel and Bubble Bath: I'm not going to lie. I was always hesitant to purchase any of these Philosophy 3-in-1's because they seemed over hyped and not worth the $18-25 price tag. I'm never going to use a product like this on my hair, and sadly don't take the time for baths like I used to so I figured they were too much for a shower gel. However, when I was still working at Ulta last winter, they did an amazing sale on these and I picked up this one in Cinnamon Buns and also Christmas cookie (currently in my shower). The thing that surprised me the most is how long they really last. I just finished up Cinnamon Buns about a month ago and used it in every single shower since last year. The product is very concentrated so you don't need much but still get a good creamy lather. I like how both of these scents aren't too intense so I didn't mind smelling sweet cinnamon all year long. I even tried making the recipe on the front of the bottle and the cinnamon buns were tasty!
Verdict: If I could get a good deal on them like last year I would definitely repurchase them seeing as you get so much product for your money! (You can purchase Philiosophy at Ulta, Sephora, and Macys!) Definitely keep your eye out for holiday gift sets like this one from Sephora. You can score mini sized bottles in multiple scents to split up into multiple gifts or to give to one lucky friend!

Enjoy Sulfate-Free Shampoo: The main line carried at the spa/blowout bar I work at is Enjoy, so I was really excited to try out some new products. The first thing I wanted to get was a new shampoo and I am LOVING this one. I love that it is Sulfate-Free so ladies if you haven't tried one before free of sulfates, don't be surprised when you don't get a significant lather. You will always feel like you need to use more than you actually do, but don't overdo it. Your hair will get clean!
Verdict: I would easily repurchase this product, I just want to try out the Volume line next! If you're interested in purchasing Enjoy haircare items please email me at andreafontanabeauty@gmail.com and I would be more than happy to help you find the products for you from our blowout bar!

Lisa's Hair Elixir Clarifying Shampoo and 7-in-1 Conditioner by Carol's Daughter: This duo will always be a holy grail of mine. Before I donated my hair, I was trying to get my hair to the healthiest and longest it could be and I have to give credit to this combo. The shampoo is described as the ultimate detox for your hair and while also sulfate-free, it smells like eucalyptus, sage and lemon oils to give you a really invigorating cleanse. The conditioner does 7 amazing things; it purifies, oxygenates, replenishes, moisturizes, fortifies, softens, and detangles. It also smells amazing because of the combo of rosemary, orange, and spearmint oils. There's no parabens, no petroleum, no mineral oil or artificial colors in either! The combo seriously gives me baby soft hair and really makes it as healthy as can be. I know it sounds like I'm obsessed with these two but there is something that I absolutely cannot stand about Carol's Daughter shampoos and conditioners..THE PACKAGING! I hate the way you twist the top and try to get the product out. You have to squeeze so hard, can't get it all out at the end, and I've had multiple bottles break on me.
Verdict: I feel like I will always keep these on hand for when I need a really good cleanse or if I'm trying to grow my hair out quicker, but if I keep discovering more Enjoy products that I'm loving, which will probably happen, I would skip purchasing these because of the packaging. The shampoo and conditioner are $20 and $22 respectively and you can purchase them at Ulta or on the Carol's Daughter website.

Ulta Once Upon a Time Ginger Cookie Sugar Scrub: I don't feel like I even need to talk much about these because I have shown so many in my empties, but in case you like to know what scents I like or dislike, here is the latest I have finished up from last year's holiday collection. If you like a good grit in your sugar scrub, this is one to try! I like to use them to exfoliate before shaving since I can't use a shave cream on my sensitive legs, but I really love them for exfoliating where I have Keratosis Pilaris as well (only use this on the body though, never the face)!
Verdict: If they bring it back again this year or something similiar make sure to pick this one because the scent is yummy. Make sure to wait until they do some good deals though!

Monoi Repairing Hair Mask by Carol's Daughter: I probably picked up this deluxe sample when purchasing the full size Lisa Hair Elixir's (as Ulta loves to give away free gift with purchases).  I love how Carol's Daughter deluxe sample's always give you a great amount of product so you can try the product multiple times. I liked to save this mask for times when I've used heat on it, since I rarely curl or damage my hair, and I felt like it always brought my hair back to feeling soft and conditioned.
Verdict: At $32 for 7 oz, I'm not sure I would purchase this with my own money but I would definitely ask for it as a gift for the holidays!

I hope you enjoyed this special shower edition Empties post! Have you tried any of these products? What are your thoughts? Leave me a comment below and let me know if this helped you!

Have a beautiful day,

Dre


Sunday, September 13, 2015

Dre Does a Fresh Fall Start

There's something about the fall that I absolutely love in terms of productivity. I don't know if it's because the start of a new school year was ingrained in me for so many years, but I always feel like come September, you get a fresh start. 

I have recently made some changes in my life that have helped me feel like I'm more organized and getting more done, so I thought I would share what I have been doing in case you would like to take some ideas and incorporate them into your own daily life. 

1. Establish a morning routine. I have always loved starting my days with productive mornings but the older I've gotten the busier I am and the easier it is to hit that snooze button and skip things that I know I should be doing. A few months ago I decided to change up my mornings and start with a workout. I always feel more productive and energized throughout the day when I get my butt out of bed early and get to my gym. I leave myself enough time to get ready and plan my day when I'm done which sets me up for an accomplished day. I like working out in the morning because even if the rest of my day doesn't go as planned, I don't have to worry about fitting a workout in. I find that doing this every morning makes for a more productive week. So whatever you choose to do in the morning, try to establish a routine so that you get in the habit of starting your day successfully. 

2. Get a planner. This may not seem like a necessity once you enter into post-grad life, but I find that there's even more to keep track of in my life now that I am no longer in school. Having a planner helps me make sure I'm staying up to date in every aspect of my life which can get rid of a lot of unnecessary stress.

3. Adopt a new habit. This is a trick I learned from my dad. He took something he wanted to improve at and challenged himself to be disciplined enough to do it for a little bit every day. This is actually how his blog was born, but I think it's a great way to introduce something you want to get better at, or just get back to doing. I'm sure you have plenty of things you wish you had more time to do, so I challenge you to create a list and then tackle the one most important! You could even change it up every month. For me it's reading. I started reading just 15 minutes a day (sometimes longer if my schedule allows for it and I don't fall asleep first...haha). Whether it's right when I wake up or before I go to bed, I try to get my 15 minutes in every day.

4. Do it at night. I do this all the time. I have a million little things I want to get done at night and then I tell myself I'll do it in the morning because I just want to get to bed. But then morning comes along and you run out of time or completely forget to do it so it gets pushed off until night time again and then the  cycle continues. Just do those little things at night. Whether it's putting away my laundry that I've just folded or unloading the dishwasher, if you simply get these tasks done at night, you can start your day with a shorter To-Do list and a clearer head in the morning. 

When do you feel like you get a fresh start? At the beginning of the year in January or during the fall?
Please share your tips below for creating a fresh start!

Have a beautiful start to your week,

Dre
 

Dre Does Makeup Inspiration

Just in case you don't already follow me on Instagram, I thought I'd post some inspiration photos of looks I have been wearing recently. All are polished and professional looking, yet still quick and easy in the morning!


Lips: Sephora Cream Lip Stain in Always Red 01
Eyeliner: NYC Liquid Liner (The cheapest and best liquid eyeliner! MUST HAVE)

Highlighter: MAC Mineralized Skin Finish in Soft & Gentle

Lips: MAC Cosmetics Limited Edition Matte Lipstick in Mangrove

In all three photos my foundation was the NARS All Day Luminous Weightless Foundation.

Enjoy and follow me on Instagram @drefontana!

Have a beautiful week,

Dre


Monday, August 31, 2015

Dre Does Skincare Tips for the Active Woman

It's no secret that living an active lifestyle means you probably spend a portion of your day sweating. This can lead to breakouts, excessive oilliness, etc., so I've decided to share with you some tips on how I keep my skin clean and reduce my likelihood of breaking out. 

1. WASH YOUR FACE: I always head to the gym with a clean face which also means that I never wear makeup. I personally hate the feeling of makeup on my skin when I'm hot and sweaty in the gym so instead I do my usual morning skincare routine (since I normally workout every morning) and make sure to use a mattifying moisturizer to help combat some of the excessive oiliness. 

2. HEADBANDS ARE YOUR FRIEND: I like to wear a headband always when I'm working out. Not only does it help keep flyaways out of my face but it catches some sweat from dripping on my forehead. If you use hair products they can travel down your face and potentially clog your pores, so I like to prevent some of that with headbands (This also works well if you have bangs that could spread sweat and bacteria while working out). My favorite are the kinds with the rubber grips on the inside so that they don't move anywhere. 

3. BLOT YOUR FACE: While working out, I like to use papertowels to blot the excessive sweat from my face so that it stays clean. My gym luckily has a paper towel dispenser so I use those to get rid of sweat so that I don't have to touch it with my hands. Think of all the bacteria that your hands are touching from the machines to the weights. It's much better for your skin to use something disposable that you won't keep reusing like your hands or your shirt. 

4. KEEP YOUR GYMBAG STOCKED: I like to make sure to keep my gym bag stocked with some necessities to make sure I can always keep my face clean. It's crucial to have cleansing wipes because if you don't have time to immediately hop in the shower or wash your face again, you can at least clean your face quickly and remove sweat and impurities. Also if you're someone who gets excessively oily, I recommend keeping oil blotting sheets on hand to mattify your skin on the go. 

5. DON'T TOUCH YOUR FACE: This may seem a little obvious but some of us need to consciously think about it to stop doing it. Our hands carry so much bacteria around as we go from machine to machine at the gym, so make sure to keep your hands off of your skin. This is a tip for anyone trying to reduce breakouts, but it's expecially crucial when you're sweaty and in the gym.

6. DRINK WATER: Always make sure you rehydrate your body after working out. It's important for your skin's health to drink plenty every day but it's even more important when you workout because you are sweating so much. 

I hope these tips help you maintain cleaner skin while being active. Remember, your skin is your body's largest organ so while it's important to be active and healthy, we can't forget to take care of our skin as well! 

Have a beautiful day,

Dre

Saturday, August 22, 2015

Dre Does an Update

I'm here! I'm here! I promise. I'm back with an update because it doesn't feel right starting back up again after a month and not giving you some sort of explanation.

Long story short, I've been extremely busy working. Whether it has been doing makeup for weddings or being at the spa, I have been immersing myself in all things beauty. The spa that I work at (Remedi Spa and Wellness) is completely up and running which has been amazing, but it also means my hours have been unpredictable and extended (not that I mind completely devoting myself to something I believe so much in!)

With that being said, as days start to normalize, I'd like to get back in my habit of posting content for all of you beautiful people who love it and support me so amazingly. If you have ideas or requests, email me at andreafontanabeauty@gmail.com or leave a comment below.

If you'd like to come see me at the spa please feel free to visit remedispaandwellness.com for information on where to call and book an appointment and location! I do all sorts of services as a licensed esthetician that include facials, body treatments, brows waxing, full facial and body waxing, makeup, spray tans, and much more!

A little while ago I went back to using just one Instagram for both my life and Dre Does so feel free to click here and follow me to stay updated with every day things!

Have a beautiful weekend,

Dre

Friday, July 17, 2015

Dre Does Friday Favorites

I'm going to start integrating Friday Favorites posts a few Fridays a month to share what I love with you more frequently instead of monthly favorites posts. Whether it's a makeup product or lifestyle item, I think it would be nice to share them as I fall in love with them, instead of waiting for a list to compile and sharing it at the end of the month.

1. I can't get enough of this Skinny Cauliflower Man and Cheese recipe that a wonderful friend shared with me. I highly recommend trying it. I might have made a double recipe the first time so I could have plenty of leftovers...haha

2. Just like the rest of the beauty world, I love the Sephora Cream Lip Stains. I have about 5 of them, but this week I've been loving the shade Always Red 01. They stay on so well and don't move.

3. Masterchef. If you know me personally, it probably comes as no surprise that I love this show because I love any type of cooking competition. I love Masterchef specifically though because the main judge is Gordon Ramsey and because it is a competition just for home cooks that have no previous culinary training or schooling. It's on Hulu if you've missed it and want to catch up but it's currently about half way through the season.

4. With all of the self tanning I've been doing recently I've been trying different foundations in my collection because I feel like some days I'm more than others so not all match me. For days when I want something light, I've been loving the Pur Minerals 4-in-1 Liquid Veil Spray Foundation. It gives light to medium coverage and a satin finish that doesn't look like I have makeup on. I love how light it feels. I prefer to spray it on the back of my hand and use a damp beauty blender to apply it to my face.

Happy Friday all you beauties! Have a great weekend,

Dre

Sunday, July 12, 2015

Dre Does a Warm Smoky Eye

I decided to keep the bronze theme going from my two previous posts (facial self tanning routine and makeup to enhance your tan) with this photo tutorial that will compliment a tan perfectly. I prefer super warm and smoky eye looks over cooler ones for tan skin, especially on my skin tone. I used only three shadows to create this look so it is really easy. All three shades were from the Stila 'In the Know' and 'In the Moment' palettes. You can still order the In the Moment palette on Stila's website if you're interested but to be honest, you could find shades like these anywhere. The rest of my makeup is the routine I shared in my last post on enhancing your tan. I hope you enjoy!


1. The first step for any eye look is to apply a primer or eyeshadow base. For this look I used my Stay Don't Stray Eyeshadow Primer from Benefit Cosmetics and applied it from my lash line up to brow.
2. Next use Desert (In the Know) as a transition color on a fluffy brush and blended it into the crease. This adds a little dimension but it's purpose is mostly to make blending darker shadows easier. 
3. Add Fire (In the Know) on a fluffy brush a little at a time, blending as you go. I know this color looks intense on its own, but I promise it won't be after you add your lid shade. I love using these types of oranges to warm up a look. It's always easier to add shadow, so rather than accidentally getting it too intense in an area you don't want, apply a little at a time. 
4. Using a flat shader brush, pack Whim (In the Moment) onto the lid. Go back in with the fluffy brush and blend the edges of the brown with the warm burnt orange color. You may loose a little bit of the intensity of the brown when you do this, so pack a little extra color on the lid if you need you. 
5. On a pencil brush mix the burnt orange and brown and blend them into the lash line. Depending on your skin fine you might have to be careful with how much of the orange you use. It can sometimes make your eyes look sick, so definitely add a little at a time and don't smoke it out too crazy the first time you try it. 
6. Lastly, add your eyeliner (I just used a brown pencil in the upper and lower water lines), and mascara and you're good to go! 


Let me know if you like the format of this photo tutorial and if you'd like me to do them this way from now on! Also if you have any requests as usual, be sure to let me know!

Have a beautiful week,

Dre


Friday, July 10, 2015

Dre Does Makeup to Enhance your Tan

On Wednesday I shared my facial self tanning routine that involved two wonderful products from Tarte Cosmetics (click here if you missed it), and I promised I would share the products I've been using to enhance my tan to look very glowy and natural.


 When I have a fake tan on my face, I find that I need to do a few key things with my makeup to make sure it doesn't come off as fake. I try to keep things as simple as possible because adding a lot of  bronzing and tanning will eventually be impossible to pull off as natural looking.


Above are the key products that I have been using in a simple bronzed makeup routine. It's focused mostly on my skin since the tan is what I'm enhancing, with nothing much on the eyes.

The first thing I do is apply my foundation. I love MAC Face & Body because it is a light coverage that is waterproof and natural looking. I want my tan to shine through so I think it's important to find a foundation that compliments my skin tone rather than covering it up. I use a brush to buff this into my skin really well.

Next, I use my Urban Decay Naked Skin Weightless Concealer to cover any blemishes or areas that need a little more coverage. I love how light this concealer feels on the skin and how natural it looks. I really agree that it is weightless and complete coverage.

After concealing, I work on bronzing. I found this Sephora Collection MicroSmooth Baked Bronzer Duo in 01 Honey Heat in my collection that I remembered that I used to love and decided to put it to work. I love how one half is really shimmery and the other is more of a matte finish. I think it's important to use different tones and shades of bronzers when trying to use makeup to enhance your tan because they create dimension. The more dimension, the more natural your look will be. I use a large powder brush to mix the two shades in a 'E3' pattern. This simply means that if you trace from your left temple, down to the hollows of your cheeks, to your jawline, it creates the shape of an E. If you do the same on the right side it creates a number 3. Google this method if you need a little more explanation. It's really easy! I find this method is the quickest and easiest way to add a beautiful bronzed glow to the skin in the areas where you would naturally tan. I then take a smaller fluffy brush and use the darker, less shimmery side to contour my cheeks a little bit.

Next, I apply Benefit's Dallas blush because it is a very natural warm brown tone. It looks less like blush and more like a natural flush on the skin and it complements a tan really nicely. After blush, I move on to highlighter. I've been loving the Becca Shimmering Skin Perfecter in Rose Gold because it is such a rosy highlight shade. It looks beautiful applied to the high points of the face.

Lastly, I apply my brows and mascara. For these I use my favorites both by Benefit; Gimme Brow (a tinted brow gel that voluminizes and keeps my brows in place) and They're Real (my holy grail mascara). As with all of my makeup looks, I always spray a setting spray to hold the looks in place for the rest of the day. For this one I used Urban Decay's All Nighter.

There you have it! My quick, easy, and natural makeup look to emphasize a beautiful fake (or real) tan! As usual, if you have any questions please let me know!

Have a beautiful weekend,

Dre

Wednesday, July 8, 2015

Dre Does a Facial Self Tanning Routine

I am just like every other girl who wants to be bronzed and glowing in the summer time. However, as a licensed esthetician I know the consequences that can come from sun exposure and they are simply not worth the risk. For this reason, I am RELIGIOUS with my SPF 45 or higher on my face and neck region. While I do wear it on the rest of my body when I'm in the sun, I am the strictest with my face because that is where the aging and fine lines are going to show the soonest and the most. Due to the SPF 45 that is constantly applied, my face is always paler than the rest of my body.  I have developed a facial self tanning routine that I love to combat this issue and it couldn't be easier. 


The two tanning products that I have been using are both from Tarte cosmetics. I swear they do not pay me to talk about all of their products. If you've noticed how much I mention them, it's because they are truly one of my favorite brands. I am talking about the Brazilliance Skin Rejuvenating Maracuja Self Tanning Facial Towelettes and the Maracuja Bronzing Serum. I use the facial towelettes once a week and when not using a facial towelette I use the bronzing serum.


As you can probably imagine, I start my facial self tanning routine with cleansing. I remove all of my makeup and then cleanse my skin. I recommend exfoliating your skin next so that the self tanner develops evenly and doesn't cling to any dry patches. I prefer to use a chemical exfoliant rather than a mechanical exfoliant. Next, I tone my skin. After toning if it's a night that I am not self tanning, I will apply all of my serums or treatments for that particular night and my eye cream. Next, I use the Maracuja Bronzing Serum by applying a few drops evenly all over my face and neck. I will admit this doesn't smell good at all, but most self tanning products don't and the smell fades pretty quickly. This is a gradual bronzing serum that I like to use to extend the wear of my tans. It's not something that you will notice overnight, but I do really like the glow it gives my skin. Lastly, I apply my moisturizer, which right now is still the Maracuja Oil, also by Tarte. 

If it is a self tanning night (by this I mean that I'm using a facial towelette), I do the same routine, except I skip the treatments and serums because I find that everything looks better when I self tan right after I cleanse. The Brazilliance Facial Self Tanning Towelettes are seriously as easy as opening up a little packet, unfolding it, and wiping your face and neck evenly. You don't have to be perfect with this at all. I am not a pro self tanner and I have never had anything but great results! Then I just let it absorb and I'm done (No moisturizer or oils on this night)! I go to bed and wake up with a tanner face and neck that matches the rest of my body! I haven't noticed any residue on my pillowcases at night which is one thing I was concerned about. 

The Maracuja Bronzing Serum is still available on Sephora and Tarte's websites but I'm not sure if it is a permanent product. It is $47 and is 1.7 fl oz. I would say that if you use a few drops on your face and neck every night, it should last you at least 6 months. 

The Brazilliance Skin Rejuvenating Maracuja Self Tanning Facial Towelettes are $21 for 10 towelettes which I think is a pretty good deal, since that would last you 2.5 months if you use one a week. 

Make sure you come back Friday because I will be sharing how I've been enhancing the fake tan with makeup! 


Have a beautiful day,

Dre

Monday, July 6, 2015

Dre Does a Body Shop Review: Camomile

I have heard multiple bloggers and youtubers mention the Camomile range from The Body Shop so I decided to give two of the standout products a go. About a year ago I switched from using makeup remover wipes to using a cleansing oil to remove my makeup before cleansing. As I started to use up the oil I had, I decided to pick up the Camomile Silky Cleansing Oil because of a sale. I had also heard great things about the Camomile Gentle Eye Makeup Remover so I decided to give it a go as well.


When it comes to cleansing oils I look for a few things; that most of my makeup is removed well, it is light on my skin (not too greasy), and that it doesn't break me out. I have to tell you, this cleansing oil is amazing and passes all of these tests. You apply it to dry skin; just enough to have a thin layer all over. Then you wet your hands and you can see the oil emulsifying all of the makeup on your face. After I very gently massage it into my skin, I also lightly massage my lashes to start the mascara removal. Then once all the makeup is broken down (except my eye amekup), I wash it off my face. It doesn't leave my skin feeling greasy at all which is great! I love that this cleansing oil doesn't have a strong odor and doesn't bother my sensitive skin at all!

Affter I wash all of the oil off, I put a few drops of the Camomile Gentle Eye Makeup Remover onto a cotton pad and gently remove my eye makeup. This remover works like a dream. It is not oily at all and doesn't burn my eyes, so it would be great for contact wearers. The thing I love most is how effectively it gets off my They're Real mascara. If you've ever tried it, you know how hard it is to remove. The fact that this eye makeup remover can feel that gentle but still be so effective is amazing to me! No tugging on the eyes needed. 

You can purchase both products at ULTA or at The Body Shop. I had to buy my cleansing oil online because my ULTA didn't carry it in store. The Gentle Eye Makeup Remover was $17 and the Silky Cleansing Oil is either $18 or $19 depending on where you get it.

I highly recommend both products if you are in the market for some great, gentle makeup removers!

Have a beautiful Monday,

Dre

Friday, July 3, 2015

Dre Does 3 New Ways to Tie your Bikini

It's no secret that bathing suits with interesting backs have been a trend for awhile now. Everywhere you look they have extra straps or cool criss-crossed details. Whether you can't afford to buy a new bikini top every time there's a new trend, or (like in my case) you need to be able to adjust and tighten the sizing to support the front, I've got you covered! I'm here just in time for the 4th of July, to show you three new ways to tie your basic bikini so it can look unique in the back! 
This first tie, is how my family always tied their bikinis and what inspired me to make this post. Start by tying the bottom tie how you would normally around your back. Then tie each top strap on that base tie like a bra strap. I always tie double or triple knots and make sure everything is extra tight to guarantee nothing is going anywhere! 
Next we have something similar as above except instead of tying the straps straight back, cross them and tie them to the opposite side. You will also want to tie that bottom tie around your back first like the last tie.
This is my personal favorite tie because I think it looks the coolest. However, if I'm being honest, it's best for those with a smaller chest because it doesn't really offer much support. Just criss-cross your upper straps behind your neck and tie one bottom strap with the opposite upper strap, on both sides. You may have to readjust and re-tie a few times to get the correct tightness. 

I hope you enjoyed this post and discovered a cute new way to tie your bikini this summer! Have a wonderful 4th of July weekend!! 

Dre

Tuesday, June 30, 2015

Dre Does June Favorites

I'm not quite sure where June went, but it's already time to share my favorites for the month. I don't have that many in the beauty area because I honestly have been wearing the same thing all month long and they are products you have already seen a million times. So here are a few that I've not shared as much, if at all.

Benefit's Rollerlash Mascara: I was lucky enough to try this before everyone else when I was working for Benefit and to be honest I wasn't impressed. My lashes are long but super hard to curl and I didn't feel like I got enough of a curl to ditch my lash curler like Benefit claims. It wasn't until I let the bottle dry out a little and I revisited it, that I fell in love with this mascara. I really do agree that the magic is in the wand. The little hooks really do help pull your lashes up and now that I've let the formula dry a little, I find that the curl does last. On more natural makeup days I will wear this one alone. On days where I do a full face of makeup, I will use this before I use Benefit's They're Real mascara (my holy grail) to really get some great length and curl before They're Real voluminizes my lashes. 

Kenra Platinum Dry Texture Spray & Texturing Mist: I was recommended these two products by the wonderful friend who cut my hair when I donated it last month (Thank you LC)! I have such an obsession with texturizing products because my hair can get very limp and flat looking. My hairstyle is very messy and undone looking and these products make my hair look perfect every time. I use the texturizing mist on my freshly washed and damp hair both when I'm going to blow dry it or if it's air-drying (which I will admit is most of the time since I'm lazy). If I'm working with day two hair or if I've waved it a little, I will use the texture spray to take super neat and flat hair to messy and undone looking. The thing I love most about the dry spray is that it absorbs oil so it can be used like a dry shampoo too. I love how I can take my hair down from being in a bun all day, spray this in and my hair looks alive without having to curl it. It never looks dirty, just effortlessly messy. I absolutely LOVE the smell of both of these products too. I once got asked what perfume I was wearing when it was honestly the Dry Texture Spray! haha

Origins Clear Improvements Mask: I have loved this mask for a long time. It's active ingredient is activated charcoal which is amazing for dissolving all of the impurities in your pores. Simply apply a thin layer of this mask, let it dry and wash it off. I recommend using a warm washcloth when removing to make it a little easier to get off. I love how much this cleans out my pores. I try to do it once a week. 

GapFit Breathe Racerback Tank: I could only find a picture of the hot pink tank but I absolutely love the gray version I have of this tank. I wear it all the time, both for working out and everyday outfits because it fits so well. I personally love a tight fitting tank so I enjoy the cut of them. The neckline isn't too low which I love because as a woman with a larger chest, I don't have to worry about giving someone a free show while I'm at the gym.

Target Women's Carolyn Slip on: I love these shoes. I bought them on a whim one day and have gotten so much use out of them since then (I'm even wearing them as a type this...)! I love that they are off-white, because I get the look of a lighter sneaker without committing to keeping a pair of sneakers stark white. They are super comfortable and with all the holes, I feel like they are breatheable too and don't get stinky like most sneakers do if you wear them without socks. I'm not sure if you can get them in stores anymore, but they are still online if you want to pick a pair up for yourself!

Let me know if you try any of these items! What were some of your favorites this month?

Happy almost July!

-Dre


Friday, June 19, 2015

Dre Does Summer Pops of Lip Color

In honor of the first day of Summer coming up on Sunday, I wanted to something devoted to my favorite lipsticks for summer. If there's a makeup product that I can never have enough of, it's definitely lipstick. I absolutely love the colors of lipstick that the warmer months bring.


I have a very olive skin tone, so my favorite colors to rock with a tan are definitely cool-toned pinks and fuchsia shades. A close second are the corals. With both groups though, I love to do very luminous and glowy skin, minimal bronzed eyes and then the pop of color with the lips. I'm going to show you both high end and drugstore options for both categories.

The Fuchsias: These are my absolute favorite types of shades to wear in the summer. They compliment my skin tone the best and I especially love these four below!
 
Revlon Colorburst Balm Stain "Smitten"($9.49): This is a twist up crayon type product that leaves a beautiful stain with a glossy finish (Mine is in the old packaging so it is called a Just Bitten Kissable Balm Stain but these have since been renamed to Colorburst Balm Stains).
NYX Butter Lipstick "Hunk" ($5.99): Cream finish lipstick with medium pigmentation.
MAC Sheen Supreme ($18): Sheer to medium pigmentation, high shine finish and very moisturizing on the lips. I have gone through two of these tubes already. I love this formula for a glossy lipstick.
Revlon Lip Butter "Lollipop" ($8.49): One of the more pigmented lip butters from the line; moisturizing too.


The Cool-Toned Pinks: While I'm not much of a pink girl, these two cooler shades are amazing for the summer!
 
Revlon Colorburst Matte Balm "Unapologetic" ($9.49): I love the formula of these matte balms; long-wearing and not too drying; great pigment. 
Revlon Lip Butter "Sweet Tart" (discontinued shade): Unfortunately this shade of lip butter is discontinued but I still wanted to show it to you because you might already have it and it's a good reference for color. I wanted to show the products I'm really wearing! 


The Corals: I do love a good coral in the summer, so here are a few I like to rock.
Revlon Lip Butter "Tutti Frutti" (discontinued shade): Another discontinued shade but I wanted you to see how pigmented and great these lip butter shades are. I love them for people wanting to try bright lipsticks for the first time.
Bare Minerals Marvelous Moxie Lipstick "Light it up" ($18): Cream lipstick with full pigmentation that also moisturizes.
MAC "Mangrove" (limited edition): Again unfortunately this one is hard to come by because it was a part of the limited edition Proenza Schouler Collection from last summer, but I wear this shade ALL the time when I have a tan. MAC has other shades that are similar to it. Matte finish, long-wearing, and great pigmentation.


I hope you enjoyed my favorite pops of lip color for the summer time! What are some of your favorites? I hope these gave you some inspiration to try some new shades and be a little bolder with your lip color this summer!

Have a beautiful weekend,

Dre

Monday, June 15, 2015

Dre Does Empties #2

I didn't realize it had been months since I have posted one of these until I looked back. I am definitely due! If you have never seen one of my Empties posts before, it is where I share products that I have used up and give you the verdict on whether or not I would purchase them again. So let's get started!


I decided to split up the products into two categories to make it easier. First I'll talk about skincare and then makeup products.


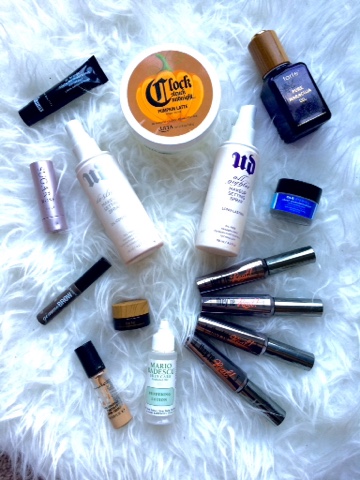
Ulta Pumpkin Latte Body Scrub: I aboslutely love Ulta's body scrubs. This one was a special edition holiday scent they came out with. It was my favorite of the collection so I bought 3 of them I think which is why I'm still using them up in June. Let's just say I'm dying to get into some other scents I have but I'm trying to be good and use these up. If you need a good gritty exfoliating scrub, you need to try these! I use them to exfoliate before shaving since I can't use shaving cream and they work great! Definitely check them out the next time Ulta has one of their frequent Buy # get # free sales!
Verdict: I will purchase the body scrubs again, just not in this scent because I'm pretty sure I've almost OD'ed on it...

Urban Decay Setting Sprays in All Nighter and De-Slick: De-slick was the first setting spray I ever fell in love with and to this day it is my favorite that I have tried. I love how well it controls my shine and makes everything stay put. I use it on every bridal client, especially in the summer so no makeup melts off the face. A few months ago there was an All Nighter two-pack for a ridiculously good deal at Ulta, so I decided to pick that up instead of De-Slick and while I still like it, it's not my favorite. It does help my makeup last, but for oily skin and the summer heat, I still prefer De-Slick. 
Verdict: I am still finishing up the other half of my two-pack of All Nighter, but I am going to try the Makeup Forever Mist & Fix next. Updates to follow.

Tarte Pure Maracuja Oil: Do I really need to talk anymore about this on here? Haha if you have been following me for a while you know that this is my holy grail moisurizer. If not, I can't say enough great things about it! I use it morning and night instead of a moisturizer (or after a moisturizer in the off chance that I am dry) and it helps my skin tremendously. I wake up every morning with soft and supple skin and the vitamin C really helps even out my skin tone and fade old scars. I feel like it has also brought a radiance back to my skin that I love.
Verdict: I will repurchase it until they stop making it. And then I will hide in my room and cry until Tarte decides to bring it back into production. So yeah... You should try it...

Ole Henriksen Sheer Transformation Facial Moisturizer: I really love Ole Henriksen's products and this is no exception. If you're looking for a light moisturizer that will exfoliate and help fade hyperpigmentation and acne scars, try this one. A little goes a long way, it absorbs quickly and feels so nice and light on the skin.
Verdict: Definitely worth trying if you like light, exfoliating moisturizers. I will probablly purchase a full size for the summer for days that I need extra moisture to pair with my Maracuja Oil.

Mario Badescu Buffering Lotion: I was recommended this product when I was suffering from cystic acne on my chin because it is designed to target deep cystic blemishes and this is already my second bottle to go through. I really noticed a difference and hardly ever the deep cystic blemishes anymore! I highly recommend it if you get them! 
Verdict: Already have purchased and am using my third bottle!

Tarte Maracuja C-Brighter Eye Treatment: This is the sample size that I got free with purchase from Ulta, but I currently am using the full size and I love it. I use it as my eye cream morning and night and feel like it is really helping diminish the darkness around my eyes. I mentioned it in my May Favorites if you want to know more!
Verdict: Unless I discover a new eye treatment that I want to try, I will probably repurchase this one when I am out.

Dr. Brandt Microdermabrasion Skin Exfoliant: This is the deluxe sample size that I got from an Ipsy Glambag probably over a year ago, but I made that thing last as long as I possibly could until I got the full size. I love the scent because it smells like lemons. It does a wonderful job of exfoliating the skin but I would be careful if you have super sensitive skin, because sometimes it can hurt slightly. I also like that you don't need a lot of product for one use because it is an expensive one.
Verdict: I probably won't repurchase the large size because it is so expensive and I don't mechanically exfoliate my face as much as I do chemically.


MAC Pro Longwear Concealer in NC30: I absolutely love this concealer and it is my favorite full coverage undereye concealer. It literally does not budge until you use a makeup remover or cleanser to get it off. It's no stranger to my Freelance Kit and something I always go back to.
Verdict: I already have a few backups because I can't go without it. It will always be something I repurchase.

Benefit's They're Real Mascara: I feel like I should be embarrassed that I have 4 in my empties but it's seriously the only mascara I wear because nothing compares to it. I makes my lashes longer while still making them look thick and voluminous. The brush is so easy to use to comb through your lashes so you have no clumps. The part that makes my favorite mascara though is the wear. I have crazy long bottom lashes and 99% of mascaras leave dots on my undereye area because they just can't stay put. Not with They're Real though. I don't have to worry about smudging or dots! It is so worth the $23 price tag. 
Verdict: I have obviously repurchased this many, many times and don't plan on stopping!

Fresh Sugar Lip Treatment: I talked about my love for these Lip Treatments in a recent post (click here to see it) and I used up one of the original Rose Treatments. This one is great if you don't want a lot of pigment. I love that these have SPF so I use them a lot in the summer. 
Verdict: While I love the rose color, I like to try a new shade every time I purchase them!

Benefit Gimme Brow in Medium/Dark: This product is another holy grail for me. I love how easy it is to use. If you are scared to fill in your brows or need a gel that will hold them in place, do yourself a favor and head to a Benefit counter to at least try it. I have gotten so many people addicted to it, due to it's ease of application and natural look! It only comes in two shades (I wear the darker of the two). It has little microfibers in the tinted gel that cling to your brow hairs, giving a fuller but still natural, appearance. 
Verdict: This is another product I will always have on hand because I never leave the house without at least this and mascara!

Well those are my empties for now! I feel like this post turned into an accidental favorites post because I really love so many of these products, but I think it's still helpful to see the products I love. I hope you enjoyed and have a wonderful week!

Have a beautiful day,

Dre


Dre Does.... © 2011. Template by Dicas Blogger.

TOPO